Scripts and jobs
After this chapter, the students can construct scripts consisting of multiple commands and run these scripts, providing a command-line argument as the input. They can start and control jobs on a personal Linux system and on a supercomputer’s slurm batch job system.
Text editors
Writing computer programs or scripts requires a text editor. The CSC web interface provides Visual Code Studio for serious programming; however, that is far beyond our needs and unnecessarily complicated for our tasks. We use here the text editor that comes with the Jupyter interface; one could also use the editor within RStudio (which is also provided by CSC) if that is more familiar.
Text editor within Jupyter
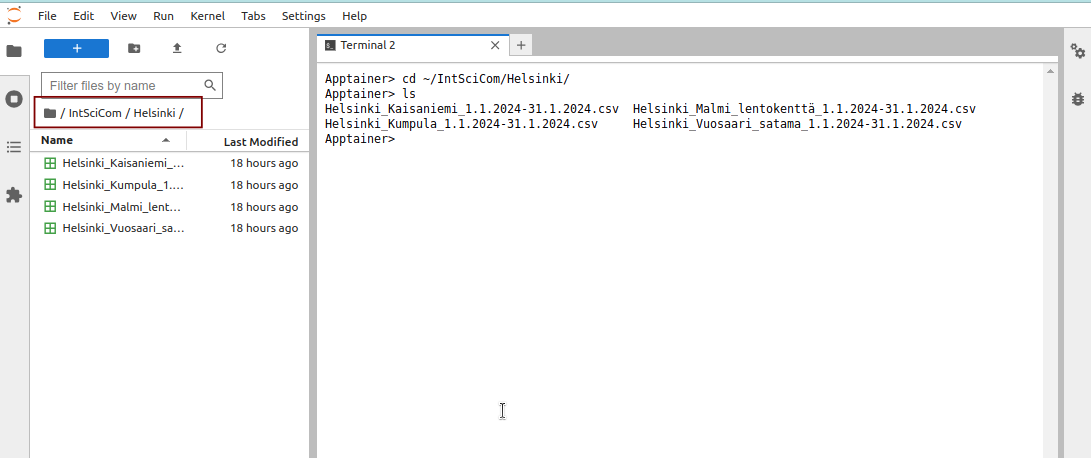
In Jupyter, one can browse to the right directory using the file browser on the left. Here, the directory path (highlighted with a red box) matches the path in the terminal:
One can then click the blue Plus-button in the left-top corner to open a menu from which to create a new text file, the second from the left in the bottom row:

One can rename the file by right-clicking its label in the file browser (on the left) and then selecting the “Rename” option:

Here, the file was renamed as “convert.sh”:

After changes, the file can be saved with Ctrl+s or through the menu on the top:

Those with sharp eyes may have noticed that the Jupyter file browser provides a graphical interface to do some of the tasks that we learned to do in the command line. One can, for example, rename, copy, move and delete files and directories. One can also create new files and directories, as well as new notebooks that we’ll look at later.
Text editing in the command line
Those using mainly Microsoft Word may think that a good text editor has to have an interface with icons and menus, and lots of text types and fonts. When writing computer programs or scripts, very little of those are needed (different colours for the text help, though) and many people strongly favour text editors that lack all the graphical features and browseable menus. Traditionally, there have been two camps among the Unix-users, one favouring ‘emacs’ and the other ‘vim’ (or ‘vi’) as their editor. One can study the differences between the two from the web resources and then decide if it’s worth learning either of them thoroughly.
Although one can very well work with the graphical editors only (among which I count the Jupyter text editor), it is good to know just the basics of ‘vi’ (which is a smaller and less sophisticated version of ‘vim’) to survive if nothing else is available. The reason to learn specifically ‘vi’ is that it is a very small program and the most likely of any text editors to be present on any Linux system.
vi is used in the terminal window. A new file is created by giving it as the argument for vi:
> cd ~/IntSciCom/Helsinki/
> vi myfile.txt
vi has “insert mode” and “navigate mode”. One starts with the “navigate mode” but in our file there is no content to navigate. One can enter the “insert mode” with the command i, that is by pressing the “i” key on the keyboard. One leaves the “insert mode” by pressing the
Given, one now press i to start the “insert mode” and write the text hello world. Once written, get back to “navigate mode” by pressing the ‘Esc’ key (in the top-left corner of the keyboard). In the “navigate mode”, many keys are commands to move around in the text (for example, ‘h’, ‘j’, ‘k’ and ‘l’ work similarly to the arrow keys) or do edits on the text. Some commands, also those for file operations (e.g. saving the file) start with the colon (:) sign. To write the file on the disk and then quit, give the command (and press enter):
:wqOne can separately first save the file with :w and then quit with :q. Sometimes it may happen that one messes up the file and want to leave without saving it first. This can be done with :q!.
We can check that evrything went right:
> cat myfile.txt hello worldWe can edit the file by reopening it:
> vi myfile.txtOne can then move the cursor (in the “navigate mode”) between the words, press i to activate the “insert mode” and then add the text there and delete the word world. (The ‘Delete’ key on the keyboard should work in both modes, ‘Backspace’ only in the “insert mode”.) :wq saves the file and quits the program:
> cat myfile.txt hello thereIf everything goes awfully wrong and one doesn’t get out of the vi editor, one can press Ctrl+z (that is, keep the ‘Ctrl’ key pressed and then simultaneously press the ‘z’ key) to send the job to the background and return to the command line. This is not a clean exit but does not do any serious damage either. We’ll revisit the background jobs soon.
Writing and running scripts
In a previous section, we wrote a combination of commands that converted the original data files into a more suitable format. If that is a task that needs to be done repeatedly, it would be good to write it down into a script that can be easily executed.
We can start by writing these commands in the Jupyter text editor (named “convert.sh”) opened earlier:
infile=$1
tail -n+2 $infile | tr -d \" | tr ',' '\t' | tr ' ' '_' | tr -d '\r'
After saving the file (with Ctrl+s), the contents are now in the file convert.sh:
> cat convert.sh infile=$1
tail -n+2 $infile | tr -d \" | tr ',' '\t' | tr ' ' '_' | tr -d '\r'With the command bash, we can execute commands from that file in the bash shell environment:
> bash convert.sh Helsinki_Vuosaari_satama_1.1.2024-31.1.2024.csv | head -3Helsinki_Vuosaari_satama 2024 1 1 00:00 -12.8 -12.5 -13
Helsinki_Vuosaari_satama 2024 1 1 01:00 -12.9 -12.8 -13.2
Helsinki_Vuosaari_satama 2024 1 1 02:00 -13.4 -13.1 -13.7Here, the first word bash tells to use bash to execute the commands, the second word convert.sh is the argument for bash specifying where the commands are, and the third word Helsinki_Vuosaa...2024.csv is the argument for the convert.sh script. In the script, infile=$1 stores the value of the first argument to variable $infile and then the cat command uses that variable to read the correct file. It is important that in the definition of the variable (infile=$1), the variable name (i.e., ‘infile’) doesn’t contain the dollar sign; also, there should be any space around the equal (=) sign.
It is not a bad practice to tell the “interpreter” for the commands; similarly, one can write e.g. python program.py and perl program.pl. There is a common practice to specify the language with the appropriate suffix but the script would work equally well even if it would be called convert.txt.
We can get rid of the bash word in the command by specifying the interpreter within the script. This has to come on the first line of the script and consist of “shebang” (sharp-exclamation) followed by the file path of the interpreter. We get the file path of programs and commands with the command which:
> which bash> /usr/bin/bashand can then modify convert.sh (in the Jupyter text editor) as:
#!/usr/bin/bash
infile=$1
tail -n+2 $infile | tr -d \" | tr ',' '\t' | tr ' ' '_' | tr -d '\r'However, if we now try to run the scrip, we get an error:
> ./convert.sh Helsinki_Vuosaari_satama_1.1.2024-31.1.2024.csv bash: ./convert.sh: Permission deniedThe problem is that the file is not defined to be executable:
> ls -l convert.sh -rw-rw---- 1 username pepr_username 94 Mar 8 15:08 convert.shWe can change that with the command chmod:
> chmod u+x convert.sh
> ls -l convert.sh-rwxrw---- 1 username pepr_username 94 Mar 8 15:08 convert.shNote that the command chmod u+x has given the user the execution permission and the fourth character is now x.
With that, the script can be executed without specifying the interpreter:
> ./convert.sh Helsinki_Vuosaari_satama_1.1.2024-31.1.2024.csv | head -3Helsinki_Vuosaari_satama 2024 1 1 00:00 -12.8 -12.5 -13
Helsinki_Vuosaari_satama 2024 1 1 01:00 -12.9 -12.8 -13.2
Helsinki_Vuosaari_satama 2024 1 1 02:00 -13.4 -13.1 -13.7Note that if we didn’t start our command with ./, we would get the error:
bash: convert.sh: command not foundThe reason is that the system searches for the commands and programs on strictly specified places, stored in a variable called $PATH and searched in the order given there. The reason for this is that there could be many programs with the same name and it would be dangerous if the system picked any of those randomly and then executed potentially malicious programs. Our current working directory is not on the system’s PATH and ./ in the beginning of the command specifies the relative file path to the executable so that the system can find it.
Alternatively, we could specify the absolute path:
> /users/$USER/IntSciCom/Helsinki/convert.sh Helsinki_Vuosaari_satama_1.1.2024-31.1.2024.csv | head -3
Helsinki_Vuosaari_satama        2024    1       1       00:00   -12.8   -12.5   -13
Helsinki_Vuosaari_satama        2024    1       1       01:00   -12.9   -12.8   -13.2
Helsinki_Vuosaari_satama 2024 1 1 02:00 -13.4 -13.1 -13.7Often one doesn’t need to be able to execute scripts without the path or the interpreter. If one wants to do that, the directory where the script is has to be added to the path. We can add the current working directory . to the path with the command:
> PATH=$PATH:.Now, the script is found and appears as any other program:
> convert.sh Helsinki_Vuosaari_satama_1.1.2024-31.1.2024.csv | head -3Helsinki_Vuosaari_satama 2024 1 1 00:00 -12.8 -12.5 -13
Helsinki_Vuosaari_satama 2024 1 1 01:00 -12.9 -12.8 -13.2
Helsinki_Vuosaari_satama 2024 1 1 02:00 -13.4 -13.1 -13.7It is common practice to collect often-needed self-made scripts into one place, usually in the directory ~/bin/ in the home directory, and then add that permanently in the system’s PATH. That is beyond the scope of this exercise but the interested can google the term ‘bashrc’ to learn one way for permanent setting of the path.
A useful script can be very small. We could rewrite (in the Jupyter text editor) our script’s functionality using just sed:
#!/usr/bin/bash
sed -n 2,\$p $1 | sed 's/[\"\r]//g;s/,/\t/g;s/ /_/g'We can then use the script to convert single files:
> convert.sh Helsinki_Vuosaari_satama_1.1.2024-31.1.2024.csv > Helsinki_Vuosaari.tsv or incorporate it in a loop that converts many files:
> for infile in $(ls *csv); do
place=$(echo $infile | sed -r 's/([a-z]+)_([a-z]+).*/\1_\2/I')
convert.sh $infile > $place.tsv
done
> ls -1 Helsinki_*.tsvHelsinki_Kaisaniemi.tsv
Helsinki_Kumpula.tsv
Helsinki_Malmi.tsv
Helsinki_Vuosaari.tsvIt is good to collect often-used analysis steps into scripts. With some practice, one can further develop these scripts such that they are more generic and can be used for different slightly varying cases. For a beginner, it is perfectly fine to make simple scripts and use these with the interpreter and the file path as we did first.
Running jobs on a small Linux system
We have so far worked with interactive programs that run quickly and produce the intended output immediately. Sometimes that is not the case and the program may run for a very long time such that having a terminal window open for each running program is not practical. In those cases the “jobs” (the run of program) should be sent to the “background”.
Let’s first make a program whose running time we can control:
cat > program.sh << 'EOF'
for i in $(seq 1 $1); do
echo $i
sleep 1
done
EOFThe command sleep sleeps for the number of seconds defined by its argument, here for one second (sleep 1). The command is within a loop that is executed the number of times given by the argument, and on each round the count is printed out. One can run the program for five seconds with the command:
> bash program.sh 51
2
3
4
5The run of a program (that is in the “foreground”) can be cancelled with ‘Ctrl+c’. For example, pressing (simultaneously) ‘Ctrl’ and ‘c’ after three seconds kills the job:
> bash program.sh 101
2
3
^C The job can be paused with Ctrl+z, here pressed after three seconds:
> bash program.sh 101
2
3
[1]+ Stopped bash program.sh 10We can see the status of running and paused jobs (if any) with the command jobs:
> jobs[1]+ Stopped bash program.sh 10One can continue a paused job by bringing it to the foreground with the command fg:
> fgbash program.sh 10
4
5
6
7
8
9
10Now, the list of running or paused jobs is empty:
> jobsThe command sleep 30 runs for 30 seconds and then finishes doing nothing else. We can use that as a long-running program. We can start it with the command:
> sleep 30and before it has finished (in 30 seconds), pause it with Ctrl+z:
^Z
[1]+ Stopped sleep 30A paused job can be sent to the background with the command bg:
> bg[1]+ sleep 30 &The terminal is now active and can be used to give other commands. We can check that the job is running with the command jobs:
> jobs[1]+ Running sleep 30 &A job that is in the background can be brought to the foreground with the command fg, here it is then cancelled with Ctrl+c:
> fgsleep 30
^CIt seems unnecessarily complicated to start a job in the foreground, pause it with Ctrl+z and then send it to the background with bg. Indeed, one can send any job directly to the background by adding the ampersand & in the end of the command:
> sleep 30 &[1] 1770417The outputted number is jobs ID on the computer system and it varies on each run. We can see the job running:
> jobs[1]+ Running sleep 30 &Here, the [1] is the jobs number within this terminal and we can use that number (with a percentage sign added in front) to terminate the job:
> kill %1After that, we have no running jobs:
> jobs[1]+ Terminated sleep 30Above, we learned that a single ampersand & sends the job to the background. Earlier, we had learned that in condition statements a double ampersand && means AND. The double version can also appear between commands and its function can is similar to that in condition statements.
We can separate multiple commands on one line with semicolons. If they are given like that, they are executed in order and, if one fails, the next one is executed:
> wc -l Helsinki_Vuosaari.tsv; wc -l Helsinki_Viikki.tsv; wc -l Helsinki_Malmi.tsv744 Helsinki_Vuosaari.tsv
wc: Helsinki_Viikki.tsv: No such file or directory
744 Helsinki_Malmi.tsvIf we replace the semicolons with ampersands, this becomes a condition in which every command returns either true (the command finished successfully) or false (the command failed); importantly, the evaluation of the condition is stopped at the first failure: the condition can only be true if every command gives true and otherwise it false; we know the answer at the very first false. Because of that, the output is different:
> wc -l Helsinki_Vuosaari.tsv && wc -l Helsinki_Viikki.tsv && wc -l Helsinki_Malmi.tsv744 Helsinki_Vuosaari.tsv
wc: Helsinki_Viikki.tsv: No such file or directoryThis feature can be highly useful and allows for creating combinations of commands that stop at the first error. It could be dangerous if an analysis pipeline continued and produced an output despite the earlier errors. The error could go unnoticed and the erroneous output taken as the true result.
Multiplexing with screen
A modern computer interface consists of multiple windows such that each window contains an instance of a specific program. One can easily switch between programs and tasks, retaining the status of a program within its window. One can do something very similar within an entirely text-based terminal using the program screen. Unfortunately, we cannot practice the use of screen now as the program is at odds with the concept of scheduled computing resources (see below) and the program is not available through the Jupyter terminal.
screen is useful for tasks that need to run for a very long time but don’t need active attention, or for remote (or local) tasks that last longer than the current working session. A typical use case is a server process, e.g. a http-server allowing web browsers to display html-documents or local Jupyter or RStudio servers. In those cases, the server has to be started and keep running, but one doesn’t need to actively do anything else. Another use case could be a long-running interactive work on a remote Linux machine: one would like to keep the interactive session alive but may have to disconnect the laptop for the commute.
These commands have to be performed on a terminal connection to Puhti and they do not work in the Jupyter terminal window.
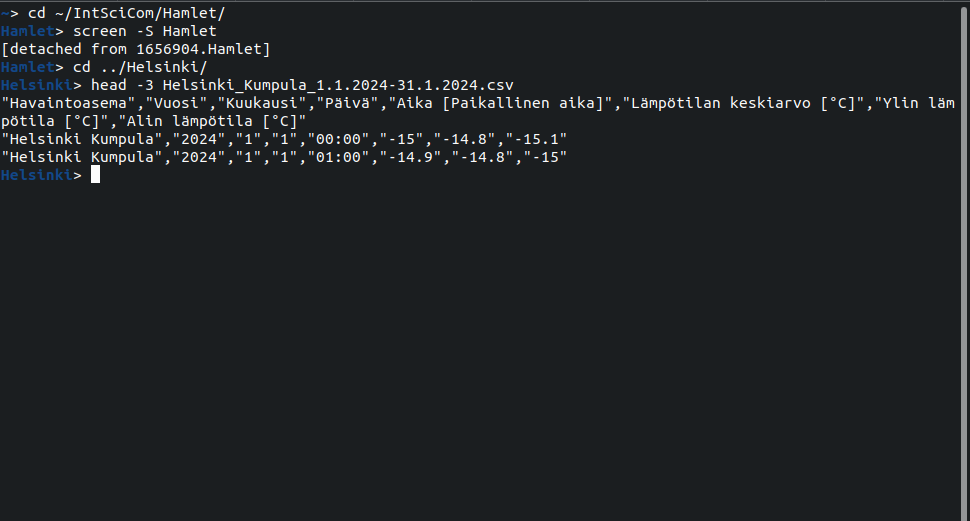
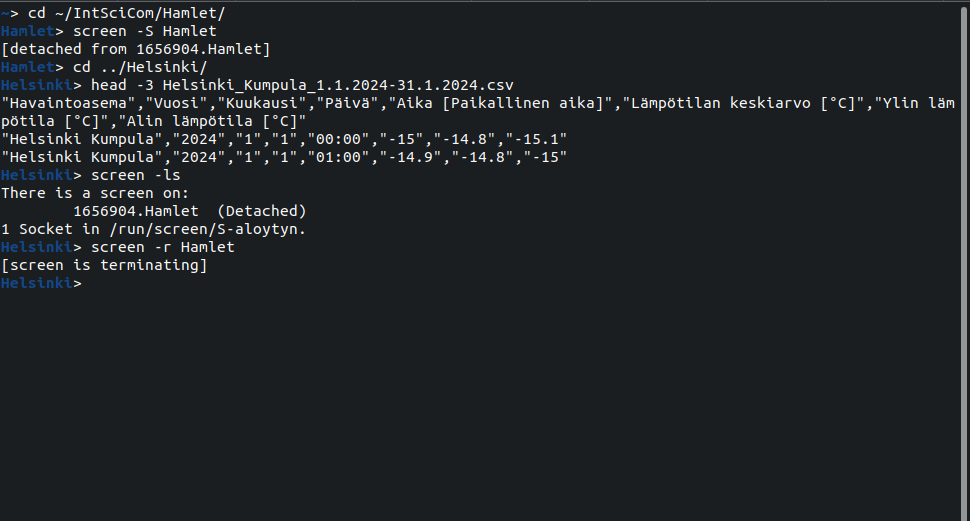
As an example of a long-lasting task, let’s start reading Hamlet and create a new session for that:
> cd ~/IntSciCom/Hamlet/
> screen -S Hamlet
This opens a clean screen, possibly with a different-looking prompt. There, we can start reading the text:
> less Shakespeare_Hamlet.txt
We can now browse the text using less:

If we need to stop reading and do something else, we can close the current view with the key combination “[Ctrl+a] d”, that is, pressing ‘Ctrl’ and ‘a’ simultaneously, releasing them, and then pressing ‘d’; this returns to the view before the initial screen command:

We can now do the other stuff using the regular terminal:
We can list the active screen sessions with the command:
> screen -ls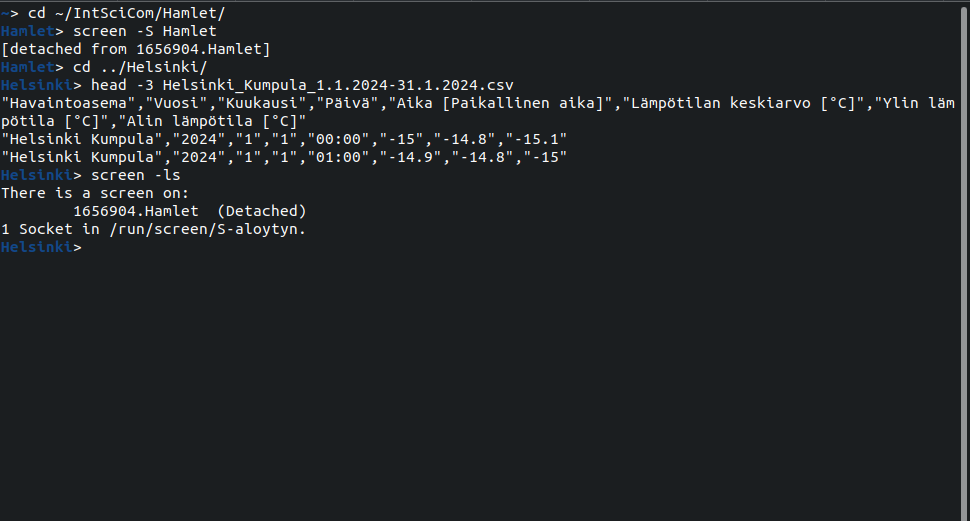
and return to an existing session with the command screen -r <name>:
> screen -r Hamlet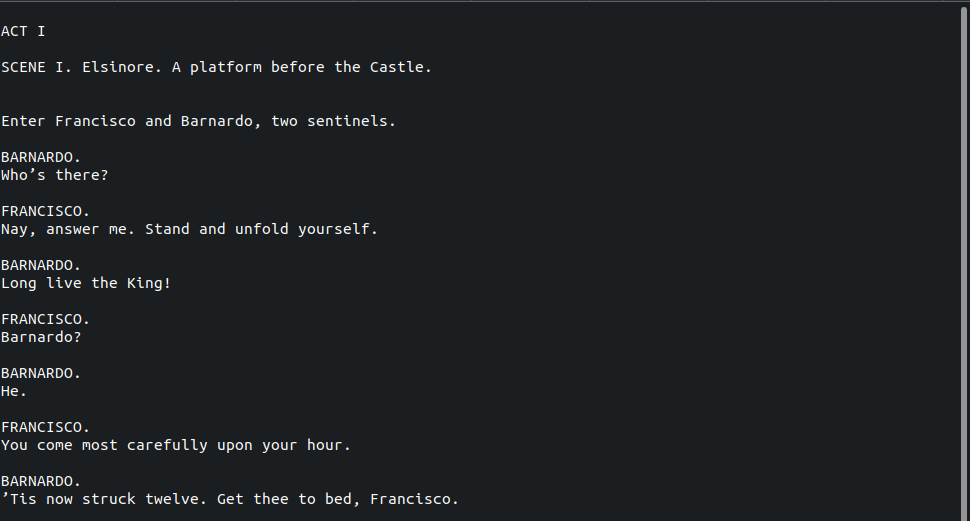
We can terminate the current screen session with “[Ctrl+a] k”. This returns to the view we had before the latest screen command:
screen can do lots more. Those interested in its more advanced features can google the net with search terms “bash screen” or “gnu screen”.
Running jobs on a Linux cluster
There are limits on how many programs can simultaneously be run on a single computer processor. If too many computationally heavy jobs are run simultaneously, each job runs slowly and the total time to complete the jobs is increased. In some cases, the computer may run out of memory and some jobs will be quit (or they “crash”). On a personal Linux computer (e.g. a laptop) or on a small Linux server (e.g. shared by a research group, used locally or through a remote connection), this can be solved by planning and manual control of the jobs. On large Linux clusters, this doesn’t work and people use sophisticated scheduling systems to control how the jobs are run.
At the writing of this text, the Puhti supercomputer at CSC had in total 1693 jobs from 264 separate users either running or waiting to be run. For the standard use, Puhti has 652 units (called “nodes”) and these have 40 CPUs (or cores) each, or 26,080 CPUs in total. (For comparison, my laptop is 1 unit and has 4 CPU cores.) The task of the scheduling system is to provide these resources to different users in a fair manner while trying to maximise the total utilisation of the system and the throughput of jobs.
The scheduling system on a computer cluster be compared to that of a university planning officer in charge of classroom bookings. Let’s assume that a big department would have 4 multi-use spaces that could host at most 200 students each but that could also be divided into smaller 20-student units; teachers would then ask for a room for their course, specifying the size (20, 40, 60, …, 200 students) and the time (1, 2, …, 10 hours) they need. One could not fit two 150-student courses into one space at the same time but could do 150 students (taking the space of 160 people) and at most 40 students; on the other hand, the two 150-student courses could be booked one after another in the same space. (Note that, somewhat unrealistically, the students on different courses are completely independent and one can schedule any two courses to run parallel.) The task would be complicated by the fact that the teachers make no prior planning and simply send their request for the next course meeting to the planning officer and wait for the officer to find a room and a timeslot for the course. Furthermore, if a course finishes early (i.e., a room was booked for 3h but is ready after 2h and 15 minutes), the planning officer should try to fill the room ASAP.
The incentives of the scheduling task are that the department has to pay rent for the spaces and is rewarded based on the throughput of students, i.e. how many “learning hours” were received. The teachers should therefore aim to book rooms whose size fits exactly their needs and have a realistic estimate of the duration of each course meeting. The challenge is that if the tasks on the course cannot be completed in time (the reservation slot ends), all the work is nullified and the course meeting has to be redone. Although one doesn’t need to pay for hours that were not used, it would be inefficient to ask for full 10 h-slots as such are difficult to find and the course meetings are delayed.
Another metaphor for the scheduling could be fitting differently-sized blocks on a moving conveyor belt. The blocks have to fit on the belt sideways (the sum of their memory requests is less than the total memory available; the sum of their CPU requests is smaller than total number available) and lengthwise (time flows as the belt moves forward). Another challenge is that new blocks are added to input all the time, no block should wait in the pile for overly long time, and one should aim to mix blocks of different colours (representing different users). The aim would be to have the conveyor belt surface maximally covered and thus maximise the throughput of blocks, respecting the other rules (fairness in resources sharing and not overly long waiting times).
Possibly playing tetris would help in the task! If one wants to practice for becoming a conveyor belt scheduler, the classic game ‘tetris’ is included in the emacs text editor. On CSC computers, one can load the emacs module and start the program with:
> module load emacs
> emacsIn emacs, tetris is started with Alt+x and then executing the command tetris. The game works with arrow keys and space. One can quit the game with the key series q; n, Ctrl+x Ctrl+c, n, ‘yes’. Reading the text at each step helps.
My Linux laptop has the full version of emacs with the graphical interface. On that, Tetris is actually quite a decent game:
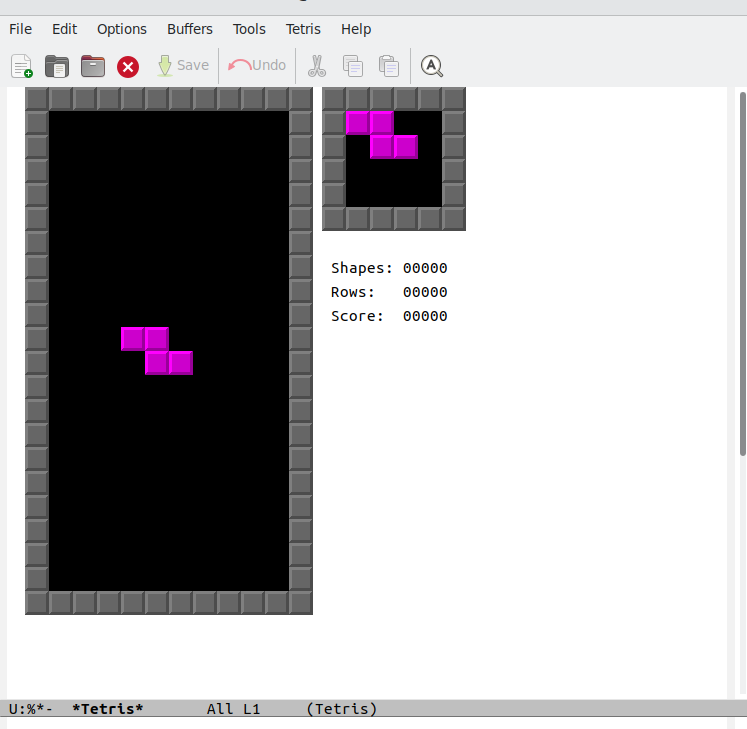
Like every respectable text editor, emacs has a handful of built-in games, including e.g. ‘snake’ and ‘pong’. To avoid the writer’s block, one can install more tools and additional useful extensions.
Some basic principles of scheduling are:
The Users pay for the computing resources (computing time and memory) in the form of “billing units” (BUs). The BUs are initially owned by the Projects and the User has to specify which project pays for the given job.
The order of running jobs depends on the jobs’ “Priority”. That depends e.g. on how much the User/Project has been using the resources over the past 30 days (those using a lot have a lower priority); the size of the jobs (it’s better to start big jobs first and fill the gaps with small jobs); and the “Weight” of the jobs (typically short jobs are prioritised over long ones).
The system doesn’t allow cheating: if the job takes more memory or longer time than requested, the job is terminated and typically all work is probably lost. One has to pay for the full space that was requested (if one asks for 10 CPUs and only uses 5 CPUS, the billing is made on 10 CPUs) but only for the time used. To be safe, it is good to request a little bit of extra but asking too much wastes BUs and slows down the progress of the jobs on the waiting list (see points 1 and 2 above).
The work of the scheduler is helped if people request for “standardised blocks” of resources. The CSC people advise to request full nodes (40 CPUs, 370 GB) for large tasks, but I’ve noticed that half-nodes (20 CPUs, 185 GB) move much faster in the queue. Importantly, two of the “half-node jobs” fit simultaneously on a single node, providing flexibility. On the other hand, there typically are small gaps and short small jobs get to run pretty fast.
CSC has a few different job partitions (or job types) on Puhti: https://docs.csc.fi/computing/running/batch-job-partitions/. Of these, ‘small’ has the greatest number of CPUs and the jobs there typically move fastest to the execution. If possible, one should design the computation tasks such that they are suitable for the partition ‘small’.
When logging into CSC Puhti system, one enters a so-called “login node”. These are not meant for heavy tasks and the tricks learned for “small Linux systems” should not be applied there. The login nodes are used to send jobs to the scheduling queue or start interactive sessions (which are also jobs sent to the queue). Here, we didn’t enter through a login node but use the Jupyter terminal – which itself is a job that was sent for the scheduler with a specific duration, amount of RAM and CPUs requested at the sta
Example job for the queue
The scheduling system used at the CSC clusters is called SLURM and the commands related to tend to start with ‘s’. We could send the conversion job familiar from the previous to SLURM with the command:
> srun -A project_2000598 -p test \
-n 1 --mem=1000 -t 5:00 -J convert-%j \
-o Vuosaari_srun.tsv -e Vuosaari_srun.err \
convert.sh Helsinki_Vuosaari_satama_1.1.2024-31.1.2024.csvHere, the first line defines the project who pays for BUs and the queue (partition) that we want to use. ‘test’ is meant for testing only and, if not finished, the jobs are cancelled after 15 minutes. The second line requests 1 CPU and 1 GB of memory for 5 minutes and names the job ‘convert-xxx’ where xxx is the job ID number. The third line specifies the files for the output (STDOUT) and the error (STDERR). The fourth line gives the command, i.e. the program name and its argument, the file with the input data.
The ‘test’ partition has no backlog of jobs and the conversion task is so quick that we can not really observe the job sitting in the queue or being executed. We could possibly get a glimpse of that if we managed quickly type the command:
> squeue --me JOBID PARTITION NAME USER ST TIME NODES NODELIST(REASON)
20745113 interacti sys/dash username R 5:10:51 1 r18c01
20753163 test convert- username R 0:01 1 r07c04In the output, the first line is the Jupyter session and the second one our convert-%j job.
The command to execute something in the cluster looks awfully complicated for such a simple task. Even worse, this is not the typical way to send jobs but often we write the parameters into a file and then give this parameter file as an argument for another program that creates the job and places it into the queue. The reason for this being so complicated is that the computing clusters are not used for tasks that take seconds and that can trivially be performed on a regular laptop. A typical job may utilise 40 CPUs, i.e. ten times the number on my laptop and each of them faster than those that I have, and last for 50 hours. For that, writing a complicated parameter file makes sense.
To describe the previous command as a parameter file, create a new text file called convert_job.sh and write there the following contents:
#!/bin/bash
#SBATCH --job-name=convert-%j
#SBATCH --account=project_2000598
#SBATCH --partition=test
#SBATCH --ntasks=1
#SBATCH --mem=1000
#SBATCH --time=5:00
#SBATCH --output=Vuosaari_sbatch.tsv
#SBATCH --error=Vuosaari_sbatch.err
srun convert.sh Helsinki_Vuosaari_satama_1.1.2024-31.1.2024.csv(Note that the first line has to be the first line of the file and there’s no spaces in #SBATCH.)
Save that file and then send it to the queue with the command:
> sbatch convert_job.shWe might see the job waiting in the queue:
squeue --meSubmitted batch job 20753412
JOBID PARTITION NAME USER ST TIME NODES NODELIST(REASON)
20745113 interacti sys/dash username R 5:44:09 1 r18c01
20753412 test convert- username PD 0:00 1 (None)Note the status (ST) and node (NODELIST) fields in the output: the status is PD (for Pending) and no computer node is yet specified for the task.
The CSC documentation for batch jobs is at https://docs.csc.fi/computing/running/getting-started/.
Example interactive job
Sometimes programs need lots of resources (computing power) but they nevertheless have to be run interactively. Interactive sessions can be started simply with the command:
> sinteractive -iDefine project with option: -A or --account
or choose a project by giving an item number from the list below:
1) project_2000598 Evolutionary genomics teaching
2) Quit
#? 1
Give time reservation in format hours:minutes:seconds [24:00:00]
15:00
Give memory reservation in Megabytes(M) or Gigabytes(G) [2000]M
2000
Give the number of computing cores you want to use [1]
Define the size of the temporary disk area [32]G
/appl/opt/csc-cli-utils/bin/sinteractive: line 271: ((: 32
32: syntax error in expression (error token is "32")
Launching a new interactive job
Interactive batch job is launched with following resources:
Maximum run time (hours:min:sec): 15:00
Maximum memory (MB): 2000
$TMPDIR size (GB): 32
Number of cores/threads: 1
Accounting project: project_2000598Despite the error message (“32: syntax error ….”), the job is created and one can run programs:
[username@r18c01 Helsinki]$ bash convert.sh Helsinki_Vuosaari_satama_1.1.2024-31.1.2024.csv | head -3
Helsinki_Vuosaari_satama        2024    1       1       00:00   -12.8   -12.5   -13
Helsinki_Vuosaari_satama        2024    1       1       01:00   -12.9   -12.8   -13.2
Helsinki_Vuosaari_satama        2024    1       1       02:00   -13.4   -13.1   -13.7
Note that the prompt line has changed and it now tells where the job is executed (here, on the node r18c01). An interactive session means that the terminal connection has been moved to another computer, to one of the computing nodes, and the user can utilise the resources there (number of CPUs, amount of memory) for the given time.
Those with sharp eyes may have spotted the same node in the output of the squeue command above. In that case, the job was sent to be executed on that computing node but the terminal connection remained in the original place.
Please note that the interactive session is typically not needed when working through the Jupyter terminal as the terminal already runs on a computing node! We’ll revisit this in the context of connecting to CSC Puhti through a stand-alone terminal program.
A similar interactive session can be started by specifying all the arguments in the command:
> sinteractive --account project_2000598 --time 15:00 --mem 2000 --cores 1 The CSC documentation for interactive jobs is at https://docs.csc.fi/computing/running/interactive-usage/.
The philosophy of Unix is to construct complex functionalities from the interplay of multiple simple programs. This becomes even more powerful when the good combinations of tools are built into re-useable packages, known as “scripts”. A script can be static and applied every time in the same way or controlled with input parameters or with internal conditions. On large computer clusters, jobs are sent to a centralised queue from which they get executed when resources become available. To efficiently share the resources for large numbers of jobs, the requirements of each job (maximum RAM, CPU, time etc.) have to be defined in advance.